Importing Work Items
Downloading the Data Template
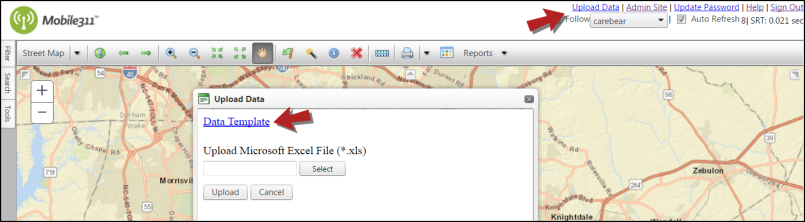
- From the map, click on the Upload Data link.
- A pop-up window will appear where you can download the Data Template.
Filling out the Data Template
The following fields are listed on the Data Template spreadsheet *Note: Required fields are indicated:
- Upload Status, Error Message, and Guid - These fields are informational and can be left blank.
- Work Type ID - This is the ID number associated with your Work Type. To find this ID, navigate to the Admin Site and access your list of Work Types. The ID number is located in the first column. *Note: This is a required field.
- Citizen Request - Enter True if this work item was requested by a citizen or enter False if the work item was not requested by a citizen. *Note: This is a required field.
- Latitude and Longitude - *Note: If latitude and longitude coordinates are not available, you must enter the House Number, Full Street Name, City and State.
- Collected Date - Enter the date you would like the work item to generate. If this is an older work order, you can enter a past date here. *Note: Collected Date should follow the format MM/DD/YY and reflect the date you would like the Work Item to say Collected On.
- House Number, Full Street Name, City, State - You are required to fill out these fields if latitude and longitude coordinates are not available.
- Zip, Address Source, and Unique Client ID - You can leave these fields blank.
- Description - Enter a description to describe what job is being performed. This is important to fill out especially if you are importing historical work item data.
- Comments - Enter comments to describe what was done to complete the job. This is important if you are importing historical data. For current or future work items, this field can be left blank until you are ready to enter comments.
- Client Asset ID - The unique identifier for the asset you want to attach to the work item. To find this ID, search for the work item on the map. In the results panel, you will see the ID in the Asset ID column located next to the work item ID.
- Client GIS Layer - Enter the exact name of the GIS layer you want to attach to the work item. In order to attach a work item to a specific asset, you will need to enter the GIS layer.
- Priority - Enter a number 1-9 that represents the priority level for the work item. 1 = High Priority, 5 = Medium Priority, and 9 = Low Priority. *Note: This is a required field.
- Schedule Now - Enter True to create a schedule now or enter False to make this work item a future request.
- Schedule ID - The ID number associated with your schedule. Fill out this field if you want to tie this work item to a schedule. To find this ID, navigate to the Admin Site and access your list of Schedules. The schedule ID is located in the first column.
- Route ID - The ID number associated with your route. Fill out this field to tie the work item to a route. To find this ID, navigate to the Admin Site and access your list of Routes. Highlight one of the routes and click the Edit button. The route ID will be displayed at the top of the next screen.
- Route Sequence - Enter where in the route you would like the work item to appear. This is a numeric field. For Example: If you want the work item to appear first in the route, you would enter a 1.
- Save this spreadsheet to a place where you can easily access it again for uploading.
Uploading the Data Template
- From the map, click on the Upload Data link.
- Click Select to browse for your saved spreadsheet.
- Click Upload to begin the import.
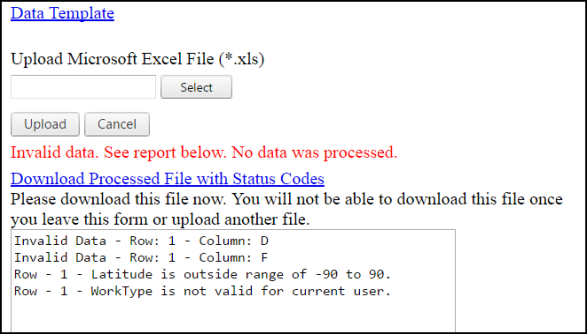
- If the import is unsuccessful, you will see a list of the errors as well as what rows and columns the errors occurred in. Click Download Processed File with Status Codes to download the spreadsheet with the error codes included. Once the errors have been fixed, you can re-upload your data.